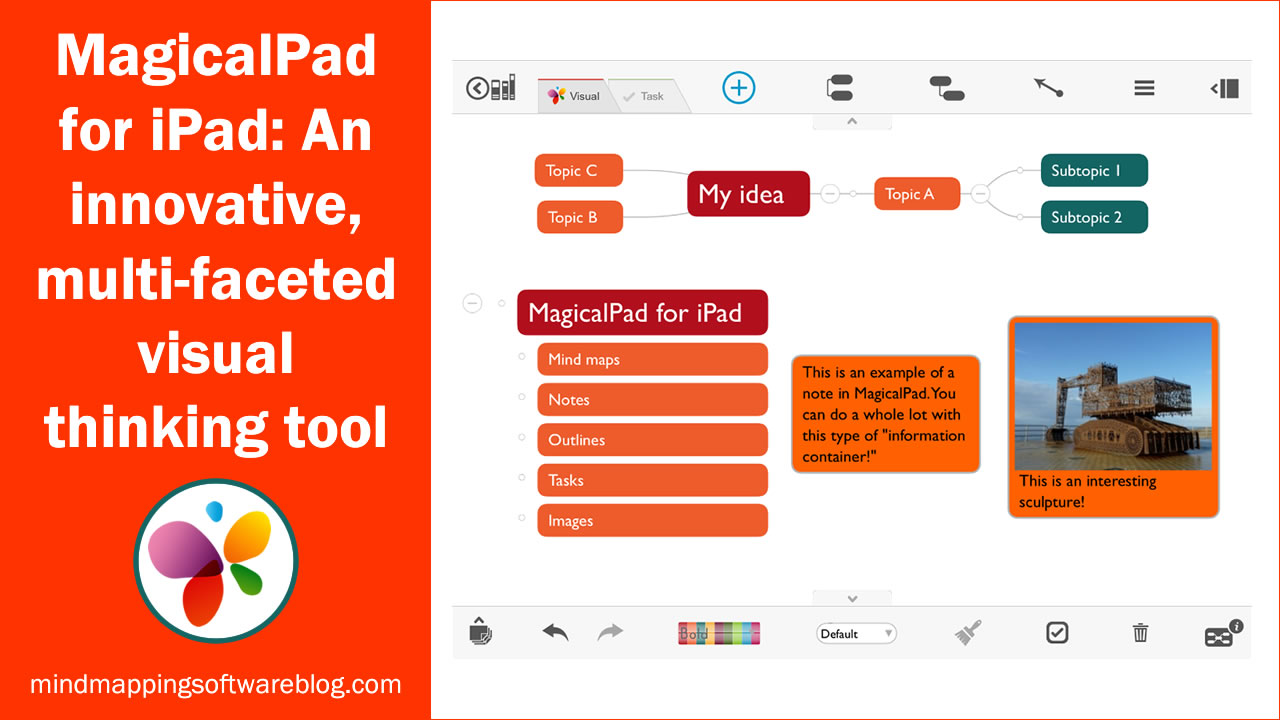
In 2011, I told you about MagicalPad, a list-making tool for the iPad that showed a lot of promise for capturing and organizing ideas. In the last three years, it has come a long way and now offers multiple ways to represent your ideas – using mind mapping, outlining, notes, tasks and images – all via a single, intuitive interface. What makes it truly unique is that you can intermingle these different types of visuals all on the same page, interconnected to one another.
In this review, I will walk you through the most notable features of MagicalPad for iPad, which was recently updated to add even more functionality, and how you can use it to enhance your productivity.
Getting started
I definitely recommend viewing the app’s “quick guide,” which is accessible from its help button. MagicalPad does so much that it’s a little overwhelming at first. Once you understand its navigation and functional conventions, it makes a whole lot more sense.
The user interface
When you first open MagicalPad, you are greeted with a row of notebooks that look like Moleskine notebooks, with an elastic cord holding each cover shut. This familiar visual metaphor gives the app a comfortable feel and invites exploration. To help you get started with this multi-functional tool, MagicalPad for iPad comes with many sample notebooks that highlights some of the most valuable business and personal applications of MagicalPad. Each workbook can have multiple pages, just like a physical notebook.
Toolbars on the top and bottom of the workspace provide access to the most common MagicalPad commands. A set of tabs entitled “visual” and “task” enable you to quickly toggle between a full, rich, colorful visual workspace and a spartan, black-and-white task list. Both toolbars contain tabs with arrows that, when tapped, cause these toolbars to slide out of the way too make more room on the iPad’s screen. They can easily be restored by tapping on the small, unobtrusive “closed” tabs.
The MagicalPad workspace is completely free-form; you can position notes, lists, tasks, mind map topics and other elements freely on an “infinite” canvas to denote relative importance and relationships between them. As you would expect, you can use two fingers to zoom in and out of the workspace, and drag with one finger to drag it horizontally and vertically.
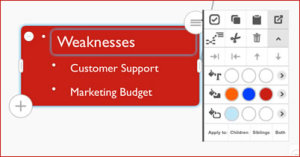
 Just like many desktop business programs, MagicalPad provides context-sensitive menus for each element that enable you to perform common tasks quickly, without resorting to the toolbars. When you tap to select an element in the app, a circle icon with 3 lines appears in its upper right corner. Tap on it, and a mini-toolbar elegantly slides out, which enables you to convert it to a to do item (which places a checkbox next to it), cut, copy, paste and delete, and move it within an outline hierarchy. A downward-pointing arrow enables you to expand this context-sensitive menu even more to reveal commands for coloring elements, such as text, mind map and note shapes as well as outline colors. I love the way MagicalPad’s context-sensitive menu is designed: It doesn’t overwhelm new users with too many options, yet advanced settings are just a tap away. Nicely done!
Each MagicalPad can have multiple pages. Tapping the page icon on the bottom toolbar displays a panel on the left side of the workspace with a list of your current notebook’s pages. It also contains buttons that enable you to add new pages, duplicate them (if you want to use one as a template for others), and delete them. A properties button on the right side of each page title enable you to adjust the background color of your page or use an image for the background. It even gives you options for background image alignment.
Adding content to your MagicalPad file
Adding content to MagicalPad is simple: Tapping on the “insert content” icon, which looks like a plus sign inside of a circle, enables you to add a mind map, outline, text, photo or drawing. Even if you’ve never used an app like this before, I found this to be an intuitive way to get started.
Mind maps: MagicalPad HD enables you to use your mouse and keyboard shortcuts to quickly build out mind maps many levels deep. Mind map topics can be converted into tasks at any time. Like a dedicated mind mapping program, map branches in MagicalPad can be expanded and collapsed. A mind map properties button gives you access to 8 different map layouts, connector line shapes (straight or curved), change how many levels of your map are expanded or collapsed and enables you to change the app’s settings so you can double-tap to create a new topic.
Outlines: To create an outline, use the “plus” button. MagicalPad creates a blank top-level topic. It then enables you to quickly create a list of first-level topics by simply typing and hitting the Enter key on your iPad’s keyboard. If you don’t have a keyboard for your iPad, the developer of MagicalPad has conveniently included a plus sign in a circle that hovers just below and to the left of your outline. Tap on it, and a new topic opens at the same level as the previous one.
Rearranging your outline is simple as well. Simply tap and drag the item you want to move. A light blue box pops up around its topic text to show it’s being moved. When you reach the topic to which you want to add it as a child, a green outline appears around your intended parent topic. The visual feedback is quite intuitive. You can also tap on the circular topic icon on the entry you want to move and open up the extended properties. You can then use a set of arrows to move it up or down the hierarchy and indent or outdent it.
Tapping on the text formatting tool in the context-sensitive menu displays a surprising array of properties you can customize to you needs – everything from font size, style and color to text alignment and outlining schemes (1.2.3.4. or A.B.C.D.). Finally, if you want to change your outline into a mindmap, there’s a command that enables you to convert it with a single tap. You can easily toggle back and forth between the two views of your information.
Images and drawings: Adding images and drawings to a MagicalPad page is also quite easy. I selected a photo from my iPad’s image gallery, and MagicalPad quickly added it to my page. Using grab handles on either side of it, I was able to resize it to meet my needs. What’s especially cool is that when you double-tap on an image, it appears in a full-screen view. But that’s not all: This view includes a pen tool and color palette, which you can use to annote your image – very cool!
Notes can be created anywhere on a MagicalPad page. Simply tap on the plus icon at the top of the screen and select text. A rounded rectangle appears where you can immediately begin entering your note. To change its location, simply drag and drop it where you want it. An icon in the note’s upper right corner, when tapped, opens to reveal a wealth of formatting options. You can also drag its right or left edges to change its width. As with every other element in MagicalPad, the properties panel gives you access to numerous formatting options.
Task view
Any item in MagicalPad for iPad can be converted into a task. You can record a wealth of information about each task, including:
- Priority
- Start and end dates
- Reminder date
- Percentage complete
- Text tags (which enable you to group your tasks in ways that make the most sense to you)
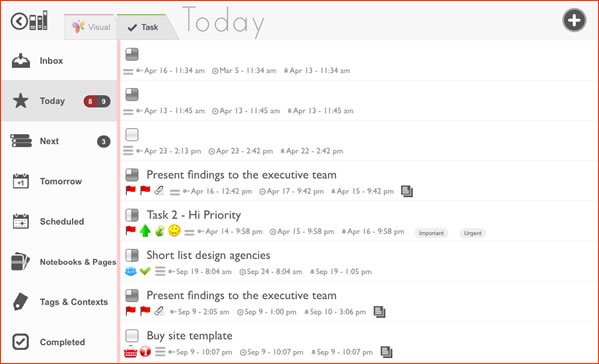
Unlike the rest of MagicalPad, which is a cornucopia of color, task view is a simple black-and-white display of the things you need to get done. A list of commands on the left side of the task view enable you to filter your list in meaningful ways, including:
- Today
- Next – tasks tagged with the text “next,” useful for designating today’s next-most important tasks (after the one you’re currently working on)
- Tomorrow
- Scheduled – for any tasks that are scheduled on dates beyond tomorrow
- Notebooks and pages – enables you to quickly jump between notes and pages in your MagicalPad files
- Tags and contexts – enables you to view your tasks using any tags you have defined. This enables you to sort your tasks by location (e.g., “at work” or “at home”) or other criteria that are specific to your needs
- Completed – lets you look at a filtered view of only your completed tasks
- Inbox – a placeholder for any tasks you want to add while working in task view.
With any task selected, you can click on an icon to toggle to the page where that task is located in visual view. This makes it easy to move back and forth between a “pure text” view of a task and a view that displays it in the context of other information related to it. That can potentially be very valuable!
Themes
New in the latest version of MagicalPad for iPad are themes, which enable you to easily set a color scheme for the mind maps in your notebooks without having to format each item separately. Taking a closer look at the “bold” theme, for example, shows a set of colors that apply from levels 1 to 8 of your mind maps. You can also store your color settings as custom themes, so you can apply them whenever you want.
Sharing options
MagicalPad for iPad offers a wealth of options for sharing your information via other applications, including Dropbox, Evernote, Google Docs and e-mail. You can export your visual notes in formats that include PDF, OPML, RTF and a native MagicalPad Xchange file format (MPX), which is great for sharing your notes with other MagicalPad users. I tried several of these options, and was pleased with the results.
Evernote: I’m a huge fan of Evernote, so I had to try this export option. Once you have authorized MagicalPad to “talk” to Evernote, you’re given the options of exporting your page as as PDF, as a native Evernote note or as a JPG image. It also gives you the option of changing the page name to something more understandable than MagicalPad’s naming convention, which includes the date and time when the page was created. Exporting in the Evernote format converts your page into an indented outline format. JPG export does just what you would expect -inserts a screenshot of your current MagicalPad page into a new note.
Dropbox: I use Dropbox to keep my work synchronized between all of my home, work and mobile devices. So this is another important export option for me. This dialog box gives you the options of exporting your page as a PDF, rich text format (RTF) document, OPML (a structured outline format) and an MPX file, which enables you to share your MagicalPad pages with other users. In addition to changing the filename, you can also designate which folder you want the file deposited into within your Dropbox account. Within the app’s settings, you can turn on automatic sync with your Dropbox account.
Conclusion
I can’t possibly cover everything MagicalPad for iPad can do in a single review. This application has some serious depth to it. It’s remarkable how far this application has come since I first looked at it three years ago. It has matured into a rich visual thinking tool that is an excellent way to record your ideas and create plans to bring them to fruition.
The one slight downside is that the application has a fairly sizeable learning curve. There’s just so much you CAN do in MagicalPad that it’s hard to know where to start. But it is intuitive enough that it rewards exploration. As I noted earlier, you may want to view the developer’s videos, which will provide you with important insights into how to use it and what you can do with it.
I highly recommend MagicalPad for iPad. For visual notetaking, there’s nothing like it. You can purchase it in Apple’s AppStore for US$9.99.


Leave a Reply