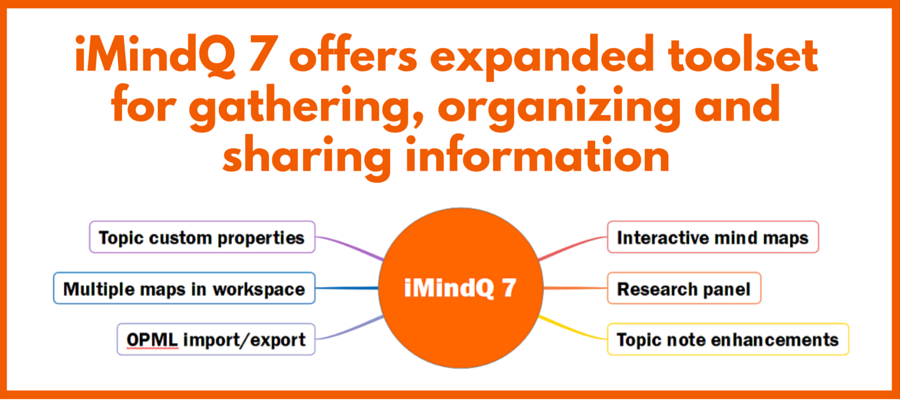
iMindQ 7 for Windows contains new and enhanced features that make it a capable tool for gathering, organizing, distilling and sharing information with others – including a new research panel, the ability to save mind maps to an interactive HTML format and support for enhanced note taking.
In this review, we’ll take a closer look at the latest version of Seavus’ mind mapping software program, focusing on its business-oriented features and functionality.
Research panel
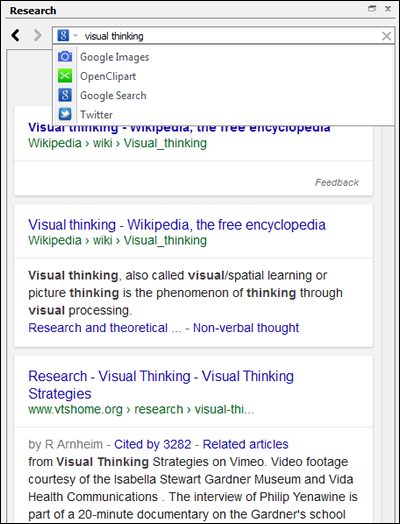 One of iMindQ’s best new features is its integrated research panel, which enables you to conduct online searches and add relevant information to your mind map. It opens in a vertical panel on the right side of the workspace and enables you to conduct keyword searches of Google Search, Google Images, OpenClipart, and Twitter. Adding information to your map is a simple drag-and-drop operation.
I conducted several searches using the Research Panel, and was satisfied with its responsiveness. Links and images opened quickly, and it was easy to drag and drop information to my mind map. I especially liked the Twitter mentions, which appear in their entirety in my mind map – along with a large, blue Twitter icon. This makes it easy to see the source of this information at a glance.
The one problem I ran into was attempting to drag and drop a larger image from Google image search into my mind map. As I approached the topic where I wanted to drop it, the floating image completely covered it, making it impossible to see if my destination topic was highlighted. As a result, two attempts at adding this image to my map resulted in it getting attached to the wrong topic the first time, and as a floating image the second time.
Interactive HTML mind maps
Interactive mind maps in iMindQ 7 are saved in an HTML format that you can upload on any website, blog or document management system, share on social media networks or send it via e-mail. They can be opened with any browser and can be zoomed, navigated and presented as animated stories or edited within the browser itself.
I exported a simple mind map with 8 first-level topics and 2 second-level topics, and then opened it in a web browser. It opens with a small, vertical toolbar with 6 controls in the upper left corner of the page that allow you to zoom in, zoom out, center the map, zoom it to fill the screen and play an animation of it. The last option draws each branch, one at a time; there doesn’t appear to be a way to control the animation on a branch-by-branch basis. If you could do so, it would be more useful as a presentation tool. The top button takes you to the iMindQ web page. I think Seavus hopes that people who view your exported mind maps will be intrigued and will want to learn more about the program.
If you click on an information icon in the upper right corner of the screen, a pop-over window appears that explains what you can do with this mind map. I tried dragging and dropping topics as it instructed; this worked smoothly. Hypertext links open in a new tab. You can also add and remove topics to an interactive mind map, although it’s not immediately obvious how to do so. By trial and error, I figured out that you can use the Insert key to do so (the de facto standard for adding topics to mind maps). It would be nice if this was called out in the instructions.
I’m not sold on the idea of giving people the ability to modify your mind maps, but the developer says any changes visitors make are not saved to the existing map. Topics can be removed by visitors so they can remove any extraneous topics that aren’t relevant to them, giving them a clearer picture of the remaining topics.
Enhanced note taking
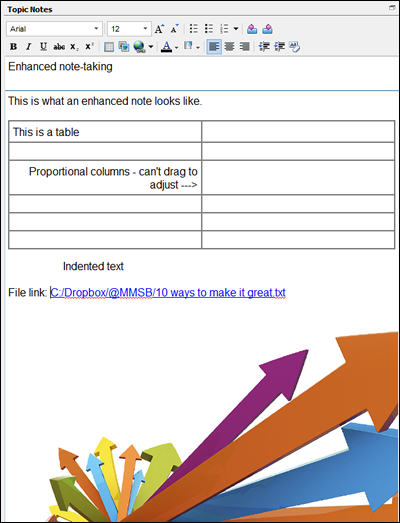 iMindQ 7’s topic notes panel has been enhanced in this new version to enable you to do more complex formatting. You can now insert:
- Images
- Tables
- Links to external web pages, mind map topics, files, folders and e-mails
The toolbar looks much like Microsoft Word, with buttons logically grouped. One nice feature is a pair of buttons that enable you to move to the previous or next searches you’ve conducted. If you do a lot of online research and find yourself going back to previous sources to double-check your information, you’ll appreciate this feature.
Another plus: A “remove formatting” button that reverts any text you import to the program’s default text style (Arial 8 pt.). Why is this important? Often, when you capture information from web pages, your notes inherit whatever formatting the web page designer used. This feature enables you to easily strip that out, giving your notes a neater, more uniform look.
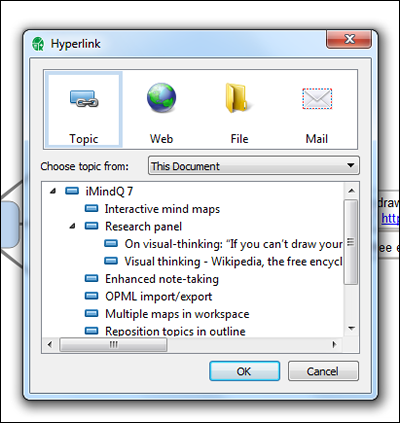 Hypertext links were a pleasant surprise. Usually, mind mapping programs contain only one option for topic note links: To a web page address. Clicking on the links icon in notes view opens a dialog box that gives you 4 options:
- Map topic (opens an outline view of your mind map so you can select the topic to which you want to link)
- Web page
- File or folder
- Email (this doesn’t link to specific e-mail messages; it simply lets you add a mailto: link to your notes, which opens a new mail form pre-addressed to the e-mail address you put in the link)
This gives you a lot of flexibility to tie together your notes with other sources – nice!
I do have several minor complaints with notes view, however: First, you can’t drag an image to resize it. I randomly selected an image from my laptop’s hard drive, without paying attention to its size, and added it to the notes view. It appeared quite large, so I tried to figure out how to resize it. With the developer’s help, I learned that this can be accomplished via a right-click “size” command, which asks you to input new dimensions in pixels.
Next, I added a table to my notes. This worked fine, except that I expected it to behave like tables do in Microsoft Word – but it didn’t. For example, I’m used to adding text to a table cell and then using the Tab key to move to the next cell. Apparently, iMindQ 7 doesn’t support this. Also, it doesn’t appear to be possible to adjust column widths. Once again, it’s nice that the program supports this functionality, but it could be improved.
Import and export OPML format
OPML is sort of like the Rosetta Stone of mind mapping software: It enables you to share maps with other programs. iMindQ 7 now has the ability to import and export mind maps in this file format. I exported my simple mind map to OPML and then opened it in a competing mind mapping program. All of the topics and links appeared properly, but topic notes were stripped out. This isn’t iMindQ’s fault; rather, it’s a limitation of the OPML format. It’s nice to see Seavus supporting such interactivity.
New map parts save time
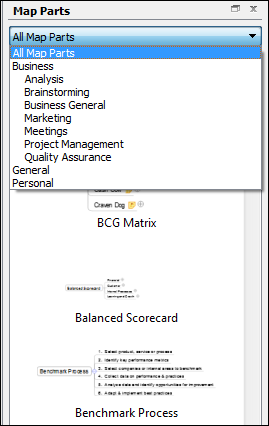 iMindQ 7 now includes 53 map parts that are designed around the needs of typical business people. They are divided into groups:
- Analysis
- Brainstorming
- General business
- Meeting
- Project
- Quality assurance
I’m a big fan of map parts, because they speed the production of mind maps. Why reinvent the wheel when you can simply drag and drop a map part into your existing mind map?
iMindQ’s map parts appear in a vertical panel on the right side of the workspace. They are displayed as a set of thumbnail images and names. A drop-down list lets you filter the long list of map parts by group, making it easier to navigate. To add a map part to your mind map, you have two options: drag and drop it, or utilize a right-click command.
You can also convert branches of your mind maps into map parts. Simply select the topic you want to designate as the parent topic of your new map part, and click on the “add selected topic(s)” link at the bottom of the map parts panel. I really like this capability, because it enables you to customize iMindQ 7 to your needs. If you frequently create the same types of maps, you’ll love this time-saving feature.
Presentation mode adds advanced animations
iMindQ 7 now enables you to automatically create a presentation from your mind map with a single click. It creates a series of “scenes” that appear in a vertical panel on the left side of the program’s workspace. You can also add your own scenes manually. But the new version of iMindQ takes presentation mode one step farther by providing a set of sophisticated animation tools that are very similar to the ones in Microsoft PowerPoint. They give you options such as focus, fade in, fade out, blur and rotate; you can easily preview these effects using a button at the bottom of the preview panel. In addition, it contains controls that let you control when the effect occurs (on click, with previous, with next) and several timing controls.
This is the first time I’ve seen such animation tools applied to a mind mapping program, and I must say, I like it a lot. It’s a great way to add extra “sizzle” to your presentations, and it’s designed to encourage experimentation.
When you play a presentation, you advance through the scenes you’ve created using the space bar. I’m pleased to see that iMindQ 7 zooms and pans you around your mind map, one topic at a time, instead of breaking it into “slides” that look disjointed and don’t give you a sense of where the topic you’re viewing resides within the overall mind map.
Conclusion
 Seavus continues to evolve iMindQ quickly, adding many new features while maintaining decent ease of use. I especially like the new research panel, which makes it easy to do online research without having to switch between this mind mapping program and a web browser. Map parts are also a valuable addition. Many of us tend to perform the same tasks in our work on a regular basis. The ability to create and store branch templates is a real time-saver for these repetitive tasks.
Overall, with the exception of a few minor usability issues, iMindQ 7 is a very capable program that is well-suited to many business applications. iMindQ 7 continues to be an excellent value at $142 (€109.0) for a single license with a one-year software maintenance agreement. To experience this new version of iMindQ firsthand, you can download a 15-day trial version of it here.

Leave a Reply