If you’re looking for a tool that can help you capture and organize your ideas and creative projects, you’re going to love Milanote. This visual thinking tool has so much going for it that it’s quite possibly one of the best-kept secrets in the productivity tool universe.
Before you accuse me of going off the deep end, you need to understand that I’m very pragmatic about note-taking and visual thinking tools. If they’re unintuitive or have a clunky interface that gets in the way of my creative work, I’ll drop it like a hot potato. Case in point: Notion. Roam. Just too frickin’ complex for my tastes, and not visual enough, either.
In contrast, Milanote offers a unique combination of ease of use, power and flexibility that truly sets it apart in the burgeoning world of note-taking and visual thinking applications. Whoever developed it not only understands the flexible nature of creative work. They also have a keen sense for designing a friendly, intuitive user interface that makes it a pleasure to work with your ideas.
I also have high expectations for being able to capture and develop my ideas, any time, anywhere. Milanote synchronizes across multiple platforms, including web, MacOS, Windows, iOS and Android applications.
To understand what Milanote is, picture a cross between a digital note-taking tool, a mind mapping application and a digital moodboard. That only starts to describe what it makes possible.
Getting started with Milanote
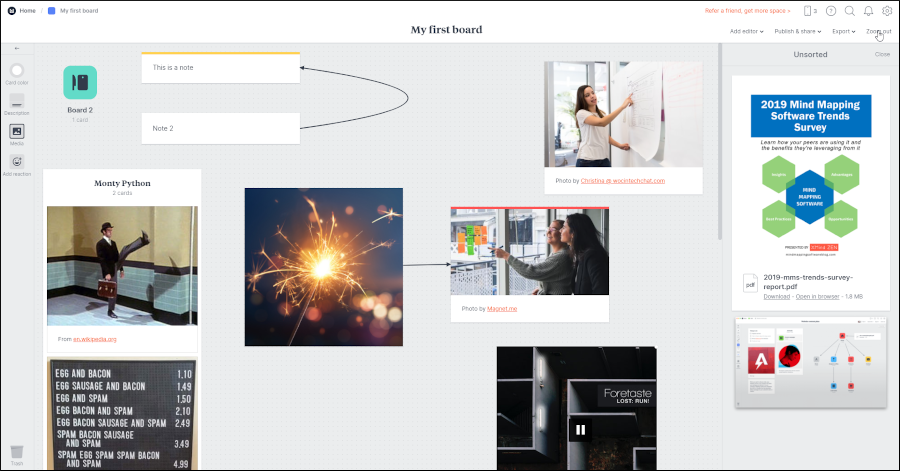
To get started in Milanote, you create a board, which is a workspace that will contain all of your ideas, inspirations and content. The application gives you access to hundreds of templates – everything from brainstorming and and mind maps to creative briefs and project plans. Or you can start out with a blank workspace and follow your own path.
You add content to your Milanote workspace by dragging and dropping elements such as a note, image, link or to-do into the workspace. Each element you add to your workspace is referred to as a “card.” Basically, it’s an object that you can manipulate with surprising flexibility.
One of the things that immediately impressed me about Milanote is the amount of attention its developers have focused on providing users with a really positive first experience. As soon as you hover over a toolbar icon, a helpful pop-up tooltip explains what to do next.
Once you drag and drop a note into the workspace, another tooltip pops up, letting you know how it functions. This only happens the first time you use each tool. After this little dose of Milanote orientation, you’re on your own. It’s a nice touch that helps new users overcome the dreaded “blank screen” phenomenon – the intimidation caused by a large, blank canvas.
When you add an element to the Milanote workspace, the vertical menu bar elegantly rotates to reveal a set of context-sensitive icons that enable you to customize it to meet your needs. For example, selecting a note gives you options to convert it into a bulleted or numbered list, apply formatting to the note text, assign a color to the note and more.
Rearranging content in your workspace is as simple as drag and drop. Whn you do so, a shadow appears under the object, making it appear as if you “lifted” it off of the canvas to move it. Nice touch! It makes you feel a little bit like you’re working with a physical whiteboard.
Lost? Simply click the forward slash key on your keyboard and a “cheat sheet” pops up with a brief summary of how to accomplish the most common tasks in Milanote.
Adding notes
Adding text-based notes to your workspace is a simple drag-and-drop operation. You can also double-click in an empty area of the workspace to create a new note card.
Notes can be used to capture concise ideas. You can also capture long-form text. Milanote gives you plenty of text formatting options, including bulleted and numbered lists, quote blocks, code blocks, inline text links and the increasingly popular markdown text styling shortcuts.
Adding images
 Milanote is first and foremost a visual thinking tool. So it’s not surprising that it offers several ways to add images to the workspace. A Chrome browser web clipper enables you to save images from the web in a single click. When you hover over an image in Chrome, a little Milanote icon appears over it, along with the word “save.” Easy and intuitive, not to mention fast.
You can also collect an image by right-clicking on it and selecting the web clipper from the drop-down menu. A small window pops up that asks you to confirm that you want to send it to your current Milanote board. Click to confirm, and it slides out of the way. This little tool makes it very easy to collect visual inspiration. Bonus: It also captures a link to the image source – instant citations!
When the image arrives in your Milanote app, it isn’t immediately deposited in your board. It appears in an “unsorted notes” panel on the right side of the workspace. This enables you to drag and drop it where you want.
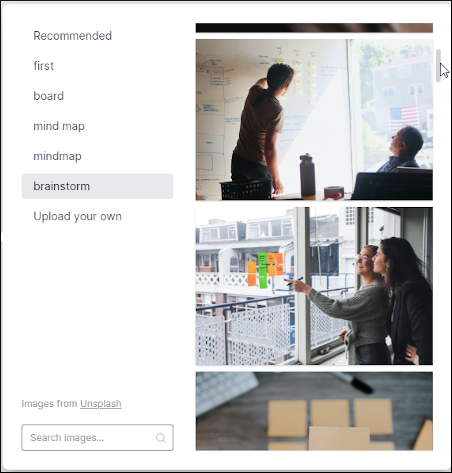
You can also use Milanote’s native image tool, which gives you access to the Unsplash library of stock images (one of my favorite sources of visual inspiration). Its search box stays pinned open until you click the toolbar icon again to toggle it closed. This is excellent interface design, because the developers have assumed you’re going to spend a lot of time here. Their intelligent design makes it easy to build your own moodboards and visual diagrams quickly and easily.
One other nice touch: The add image dialog box displays an alphabetical list of recent search terms. If you need to keep returning to this tool to add more images around the same theme, you don’t have to type your search term over and over. Just select it from the list and Milanote will display appropriate images.
Finally, you can drag and drop images from your device into the workspace. Once you’ve placed an image on a board, clicking on it opens an image editor, which gives you options to rotate or crop it to better meet your needs. I discovered another pleasant surprise here: Ghosted right and left arrow navigation buttons on either side of the image I was editing. In other words, Milanote enables you to cycle through the images in your workspace and edit them, one at a time, without actually having to return to the workspace each time. Nice!
Like notes, you can tag images with a color, which appears as a narrow horizontal band at the top of the image. This enables you to visually classify the content you’ve collected in your board. This is accomplished via a right-click command in the desktop version of Milanote. This menu also enables you to grab an original version of the image if you don’t like the changes you made to it – once again, without having to open up a new browser tab and manually navigate back to that location.
Other card types
You can also add links, files and tasks to your Milanote workspace.
Link cards not only provide you with a link to the URL you’ve saved, but also an embedded preview of it. You can use it to capture videos, audio files, Google maps and even Airtable spreadsheets.
Uploading a file places it in a queue on the right side of the workspace. This gives you the freedom to place it wherever you want.
Grouping cards into columns is easy. You simply place a column object on your board and then drag and drop cards into it. You can even use a keyboard command while dragging one card over another to combine them into a new column. Very cool!
Column tools enable you to keep your workspace organized, group ideas and create structured diagrams.
Connecting ideas
Once you’ve populated your workspace with a variety of cards, it’s easy to connect them to form processes, hierarchies and relationships. Milanote gives you several ways to do this:
You can select and drag a small circle with a tiny arrow in it from the upper right corner of a card to another one, creating an arrow line between them.
You can drag and drop a line from the toolbar onto the workspace, and manually position each end to connect with the cards you want to connect. Milanote enables you to position line connection points exactly where you want them on cards. This is quite nice, because often visual thinking tools force you to use a limited number of connection points to join them together.
You can also curve lines, add labels to them (ideal for creating concept maps) and apply a variety of styles to them. By arranging cards and connectors in a radial format, you can create highly visual mind maps.
Unsorted notes
 One truly unique and unexpected part of the Milanote interface is a panel you can open up on the right side of the workspace called unsorted notes. It’s a place where images from the application’s web clipper first appear in Milanote. But it’s also a place where you can:
- Move items you don’t know what to do with yet
- Use it as a scratchpad to quickly capture new ideas when brainstorming
- Capture quick inspirations without distracting yourself from the main thing you’re working on
As a big fan of ideation tools, I simply love this feature. It’s an excellent examples of the quality of thinking that has gone into creating this remarkable visual thinking tool.
Advanced capabilities of Milanote
Nesting boards: One of the more powerful ways to use Milanote is to create a board within a board. You could actually use this capability to designate one board as your “dashboard,” with links to all of your other boards.
Sending notes from one board to another: You simply drag any piece of content over the icon of a higher-level board to open it. You can then place it wherever you want within that board.
Designating a board as a new template: This is accomplished using a simple right click command.
Adding descriptions to notes: Milanote enables you to add text-based descriptions to notes. This makes it easy to capture information about the source of information, if you’re adding a lot of it during a research project, for example. Milanote even provides a keyboard shortcuts that automatically copies and pastes the description from one note to the next one you create – so you can quickly add a variety of excerpts from the same source to your workspace. This is a real productivity booster for researchers!
Collaborating with Milanote
If all this wasn’t cool enough, Milanote also makes it possible to share boards with your team and collaborate with them in real time. You can add @ mentions to your coworkers within a note, chat with them and add comments to their notes.
Any time, anywhere idea capture
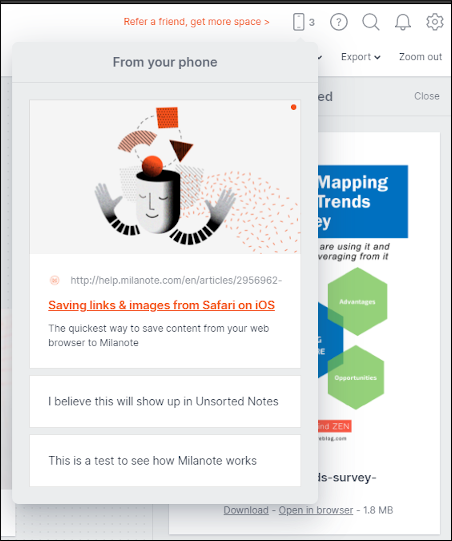 I played around with the iOS version of Milanote and was quite pleased with how it enabled me to quickly and easily capture ideas directly in my boards, or in a separate area called Quick Notes. It functions something like Unsorted Notes does on the other platforms.
To access Quick Notes on the desktop, you need to click on an icon for it in the top toolbar. This opens a panel containing them, which you can then drag and drop into your board. I don’t know why it isn’t combined with Unsorted Notes, but it does give you a bit more flexibility to keep them segregated.
As I mentioned earlier, I’m all about brainstorming and capturing ideas whenever and wherever my muse strikes. So I really appreciate the intelligent design of the Milanote iOS app.
Conclusion
Milanote is a delightfully mature and multi-faceted tool that invites creative exploration and thinking. I’m super-impressed with it. It’s intelligently designed in so many big and little ways that it enhances creativity instead of getting in the way of it.
Kudos to the Milanote dev team for creating the closest thing to a perfect creative thinking environment that I’ve seen in quite some time.
Milanote uses a freemium pricing model. With a free account, you can create up to 100 notes, images or links and up to 10 file uploads. An unlimited account is $9.99 per person per month. Team pricing is also available, and varies based on the number of people.
You owe it to yourself to set up a free account and try out Milanote. You have nothing to lose and everything to gain!

Leave a Reply